
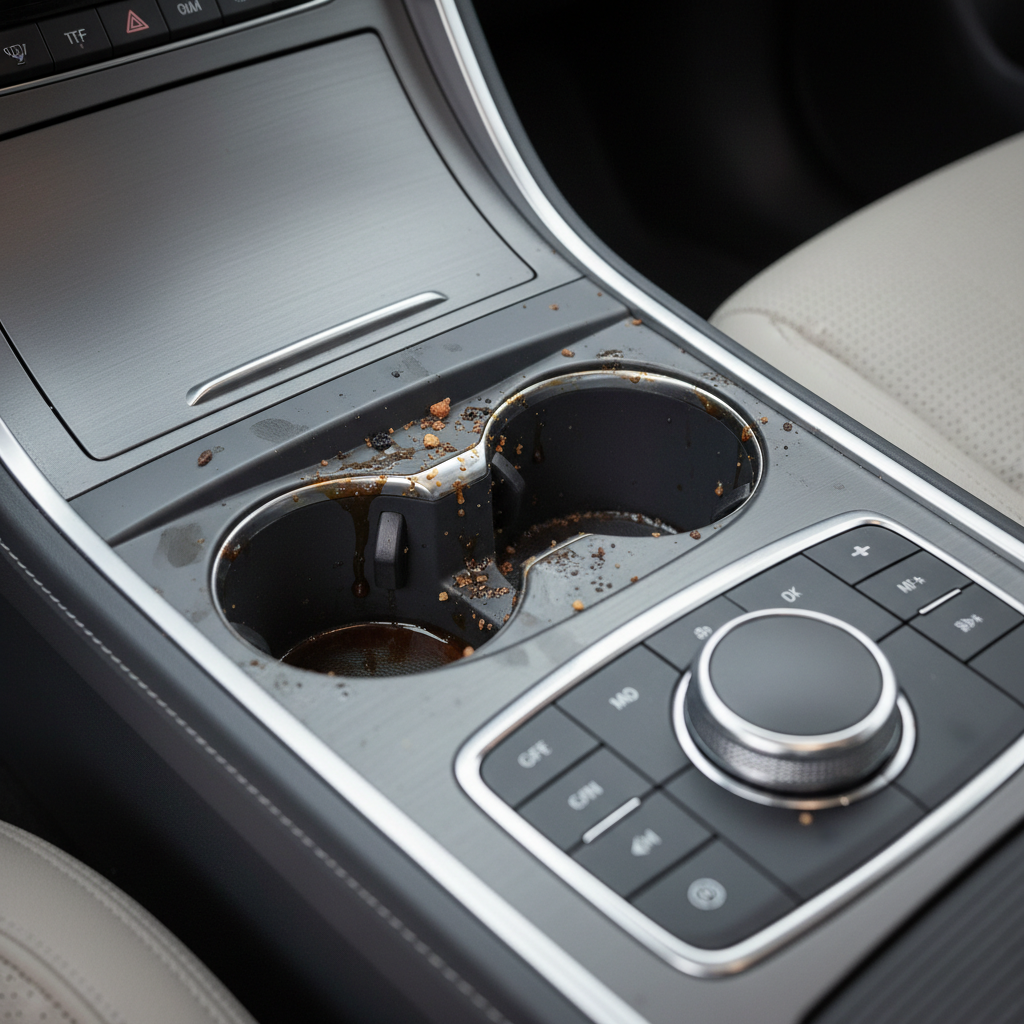
How to clean cup holders in car usually comes down to two things: removing the sticky film you can feel but can’t see, and getting into the seams where crumbs and old coffee hide.
If you’ve ever wiped a cup holder and somehow made it worse, you’re not alone. Most cup holders have textured plastic, tight corners, and a rubber insert that traps spills underneath, so a quick paper-towel pass rarely finishes the job.
This guide keeps it practical: a fast “maintenance clean,” a deeper reset for old spills, what to use on rubber inserts, and how to avoid leaving a cloudy or greasy finish. You’ll also get a quick table to match the mess to the safest cleaner.
What makes car cup holders so hard to clean
Cup holders collect the exact combo that turns into sludge: sugar, dairy, heat, and time. Add dust and lint, and you get a tacky layer that resists water.
- Textured plastics hold onto grime, so wiping slides over the top.
- Rubber liners catch spills under the edge and can trap odors.
- Tight seams around trim rings hold crumbs and dried syrup.
- Interior protectants (some “shine” sprays) can leave a film that attracts dirt later.
According to the U.S. Environmental Protection Agency (EPA), you should always read the label and follow directions for cleaning products, especially around ventilation and contact time, which matters in small enclosed spaces like vehicles.
Quick self-check: what kind of mess are you dealing with?
Before you grab a random spray, do a 20-second check. It saves you from using something too harsh, or too weak.
- Dry crumbs and dust: feels gritty, no tackiness on your fingers.
- Sticky residue: finger drags, looks slightly shiny, often from soda/coffee.
- Old stains: darker rings, possible discoloration, may not fully disappear.
- Odor: sour milk or sweet funk, usually under the insert or in seams.
- Mystery gunk: thick, uneven, may need a soft brush plus repeated passes.
If you’re seeing damaged plastic, peeling coating, or a “soft” rubber insert, assume it’s more sensitive and test any cleaner in a hidden spot first.
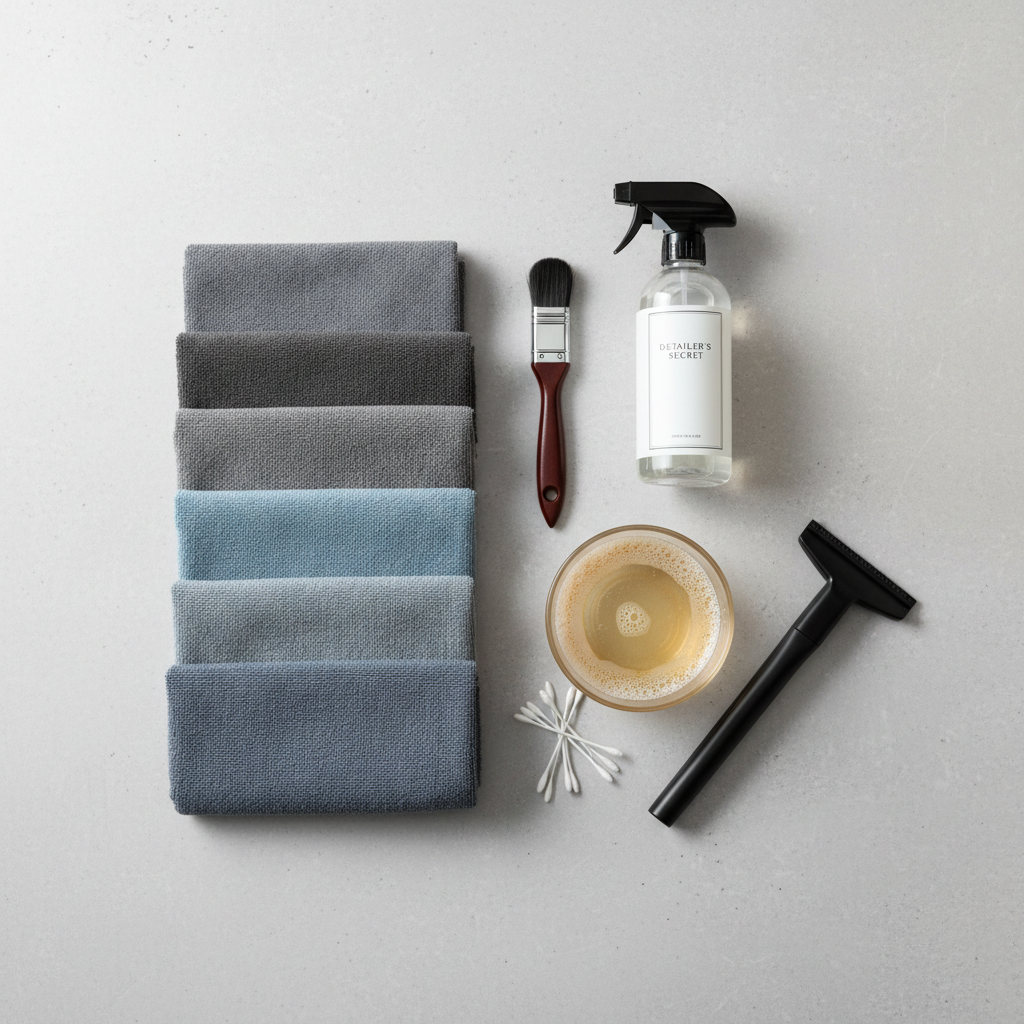
Tools and cleaners that work (and what to skip)
You don’t need a detailing cart. You do need the right shapes: something to lift debris, something to agitate texture, and something to wipe clean without lint.
Grab these basics
- Microfiber towels (at least 2, one for cleaning, one for drying)
- Cotton swabs or a soft detailing brush/toothbrush
- Vacuum with a crevice tool (or compressed air, used carefully)
- Warm water in a small bowl
- Mild dish soap
- Optional: isopropyl alcohol 70% for sticky spots (spot use, not a soak)
Use caution with these
- Bleach: can discolor plastics, strong fumes in a cabin.
- Ammonia-based glass cleaner: may haze some plastics and trim.
- Magic eraser/melamine: acts like micro-sandpaper, can dull surfaces.
- Oily interior shine products: can leave a slippery film in cup wells.
According to the Centers for Disease Control and Prevention (CDC), when using chemicals, improving ventilation reduces exposure; in a car that usually means opening doors/windows and avoiding heavy spraying.
Cleaner cheat sheet (pick the mildest option that works)
Match the problem to the lightest effective method. Most cup holders clean up well without aggressive chemicals.
| Problem | Best first choice | Step up if needed | What to avoid |
|---|---|---|---|
| Crumbs, dust | Vacuum + damp microfiber | Soft brush agitation | Soaking the area |
| Sticky soda/coffee film | Warm water + dish soap | 70% isopropyl alcohol spot wipe | Harsh solvents, heavy fragrance sprays |
| Odor under rubber insert | Soap wash insert + dry fully | Baking soda paste on insert (rinse well) | Leaving moisture trapped |
| Old stains/rings | Repeated soap cycles | Upholstery-safe/APC used lightly* | Abrasives that dull plastic |
*If you use an all-purpose cleaner (APC), confirm it’s intended for automotive interiors and follow dilution directions. When in doubt, mild soap and repetition usually wins.
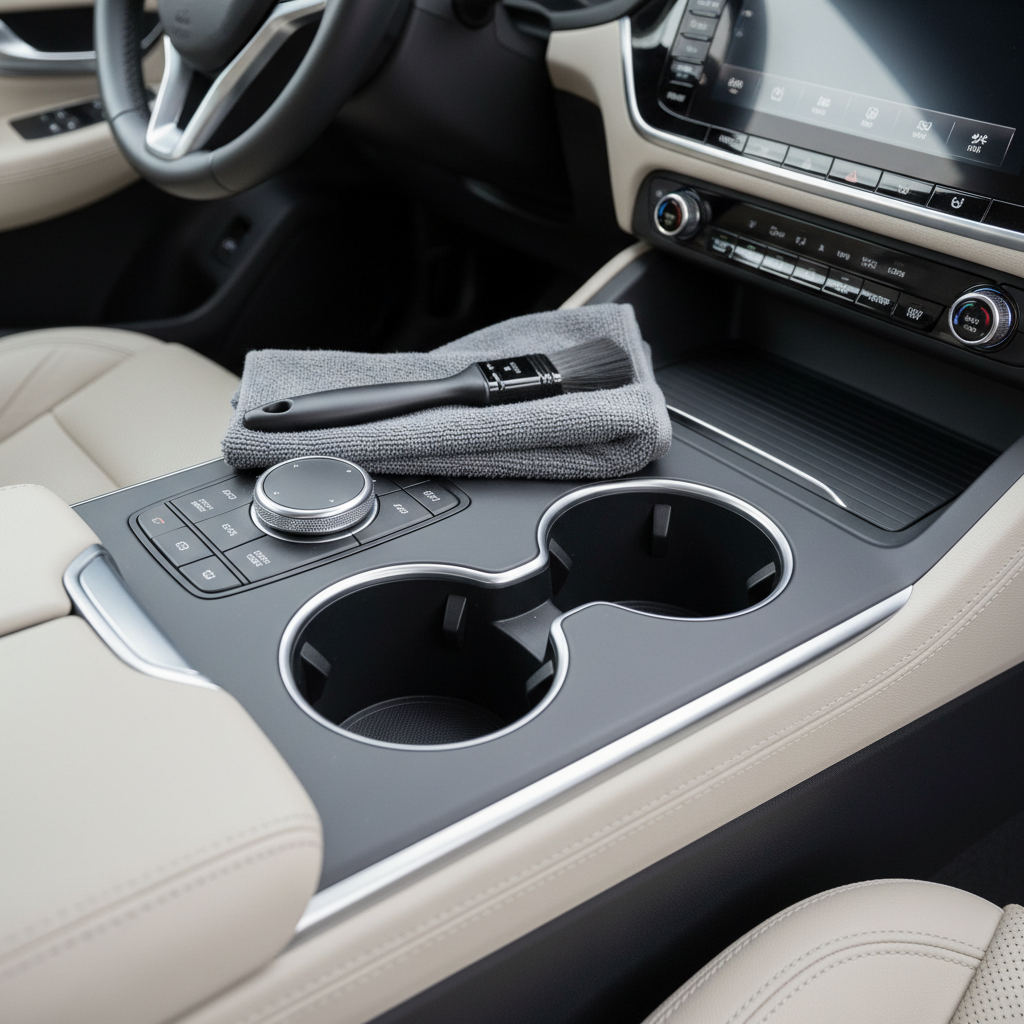
Step-by-step: the 10-minute clean (most cars, most messes)
For day-to-day grime, this is the routine that keeps cup holders from turning into a weekend project. If you’re searching how to clean cup holders in car for a quick win, start here.
- 1) Pull inserts and loose parts: rubber liners, removable trays, anything that lifts out.
- 2) Dry removal first: vacuum the wells and seams, then brush debris toward the nozzle.
- 3) Wipe with warm soapy water: damp, not dripping. Work around the rim where spills creep.
- 4) Detail the corners: cotton swabs or a soft brush for the tight ring and dividers.
- 5) Rinse-wipe: wipe again with a clean damp microfiber to pick up soap residue.
- 6) Dry fully: towel dry, then leave the console open a bit so moisture does not sit in seams.
If the surface still feels tacky after drying, don’t keep adding soap. That usually means you need either more rinse-wiping, or a targeted degunk step below.
Deep clean for sticky spills and old gunk (without damaging trim)
Old coffee, soda, and energy drinks can polymerize into a stubborn film. The trick is softening it, then lifting it out in passes, not scraping it.
Method A: Warm compress + agitation
- Soak a microfiber in warm water, wring hard, then press into the cup holder for 60–90 seconds.
- Scrub lightly with a soft brush, focusing on texture and seam edges.
- Wipe out the loosened residue, then rinse-wipe with a clean damp towel.
Method B: Alcohol spot wipe (for the last sticky layer)
- Put a small amount of 70% isopropyl alcohol on a towel or swab, not directly on the console.
- Work small sections, then immediately follow with a water-damp towel.
- Dry the area. If plastics look hazy, stop and switch back to soap-and-water passes.
Ventilation matters here. If fumes bother you, step back, open doors, and keep the amount minimal. If you have sensitive skin or respiratory concerns, it may be smart to consult a professional detailer who can choose lower-odor products.
Cleaning rubber inserts and removable cup holder liners
Removable liners are where the smell usually lives, because spills seep under the rim and never fully dry. A good wash plus complete drying fixes most cases.
- Wash with warm water and dish soap, using a soft brush on grooves.
- Rinse until water runs clean and the surface feels squeak-clean, not slick.
- Dry thoroughly, then air-dry another 30–60 minutes before reinstalling.
For lingering odor, a light baking soda paste can help on rubber, but rinse very well so you do not leave grit. Avoid leaving baking soda packed in seams, it tends to migrate later.
Common mistakes that keep cup holders dirty
Most “it still looks gross” outcomes come from a few predictable habits. Fix these and your results jump fast.
- Skipping the vacuum step: wiping turns crumbs into paste, then it spreads.
- Over-wetting: water runs into seams, then dries into new rings and smells.
- Using a super-strong cleaner too early: some plastics haze, rubber turns chalky.
- Not rinse-wiping: soap residue stays tacky and attracts dust.
- Leaving liners damp: odor returns even if the console looks clean.
Key takeaways and a simple maintenance plan
If you want cup holders that stay clean, the goal is not perfection, it’s preventing the sticky base layer from building up.
- Weekly (2 minutes): quick vacuum + damp microfiber wipe.
- Monthly (10 minutes): remove liners, wash, rinse-wipe console seams.
- After spills: blot immediately, then a small soap-and-water wipe once you park.
When people ask how to clean cup holders in car “for good,” this is the honest answer: light, frequent cleaning beats one aggressive deep scrub.
Conclusion: get the grime out, then keep it from coming back
Clean cup holders are mostly about process: dry removal first, mild cleaner next, detail the edges, then rinse-wipe so nothing tacky remains. Do that once, then stay on top of liners and seams, and the whole console feels newer without much effort.
If you want an easy next step, put a small microfiber in your glove box and do a quick wipe when you stop for gas or coffee, it’s the simplest way to keep spills from turning into “that sticky ring” again.