
how to install interior led lights in car comes down to three things: picking a kit that matches your cabin, choosing a safe power source, and mounting the strips so they stay put through heat and bumps.
If you have ever bought an LED kit, opened the box, and realized you are missing a plan, you are not alone. Most “it’s easy” installs go wrong for boring reasons: poor surface prep, wires crossing airbags, or power tapped in a way that causes flicker or drains the battery.
This guide keeps it practical. You will get a quick checklist to decide which install route fits your car, a simple wiring map, and a few “don’t do this” notes that save real time.
Pick the right interior LED kit (it matters more than people think)
Before tools come out, decide what you are installing. “Interior LEDs” can mean plug-in footwell strips, hardwired dome replacements, or full ambient lighting kits with a control box. Each has different risks and effort.
Common kit types
- USB-powered strips: easiest, usually limited brightness, can look messy if the power cable shows.
- 12V cigarette-lighter kits: still easy, often brighter, but the plug can stick out and occupy the socket.
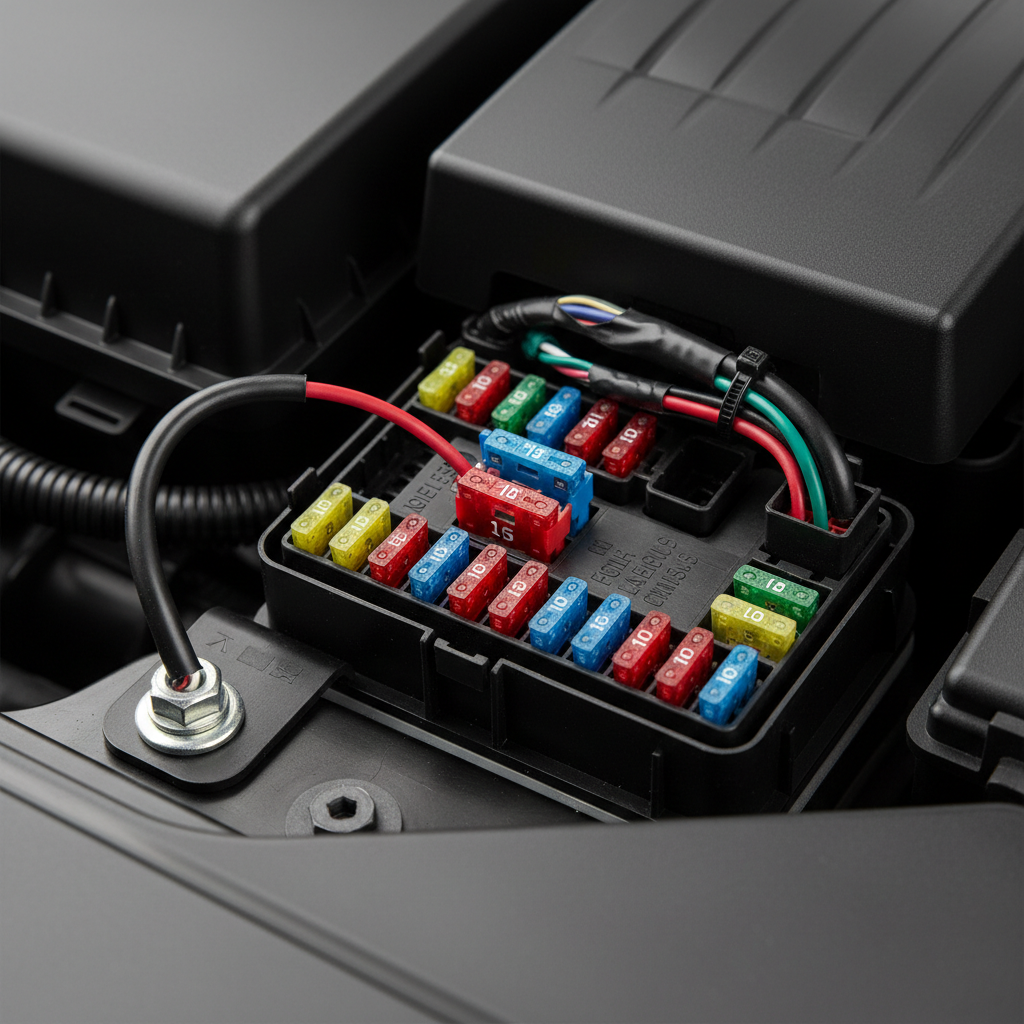
- Fuse-tap hardwire kits: clean look, best “OEM-like” result, but needs careful routing and correct fuse selection.
- LED bulb swaps (dome/map/trunk): simple if you know bulb sizes, but polarity and CAN bus behavior can cause issues in some vehicles.
Features worth paying attention to
- Color control: single color vs RGB vs RGBIC (addressable segments).
- Dimming and memory: whether it remembers your last setting after the car turns off.
- Controller location: a bulky controller is harder to hide neatly.
- Wire length: short leads force awkward routing, long leads need clean bundling.
One realistic note: if your goal is subtle ambient lighting, look for diffused strips or kits with light bars. Bare LED dots can reflect off plastic and feel “aftermarket” no matter how perfectly you wire them.
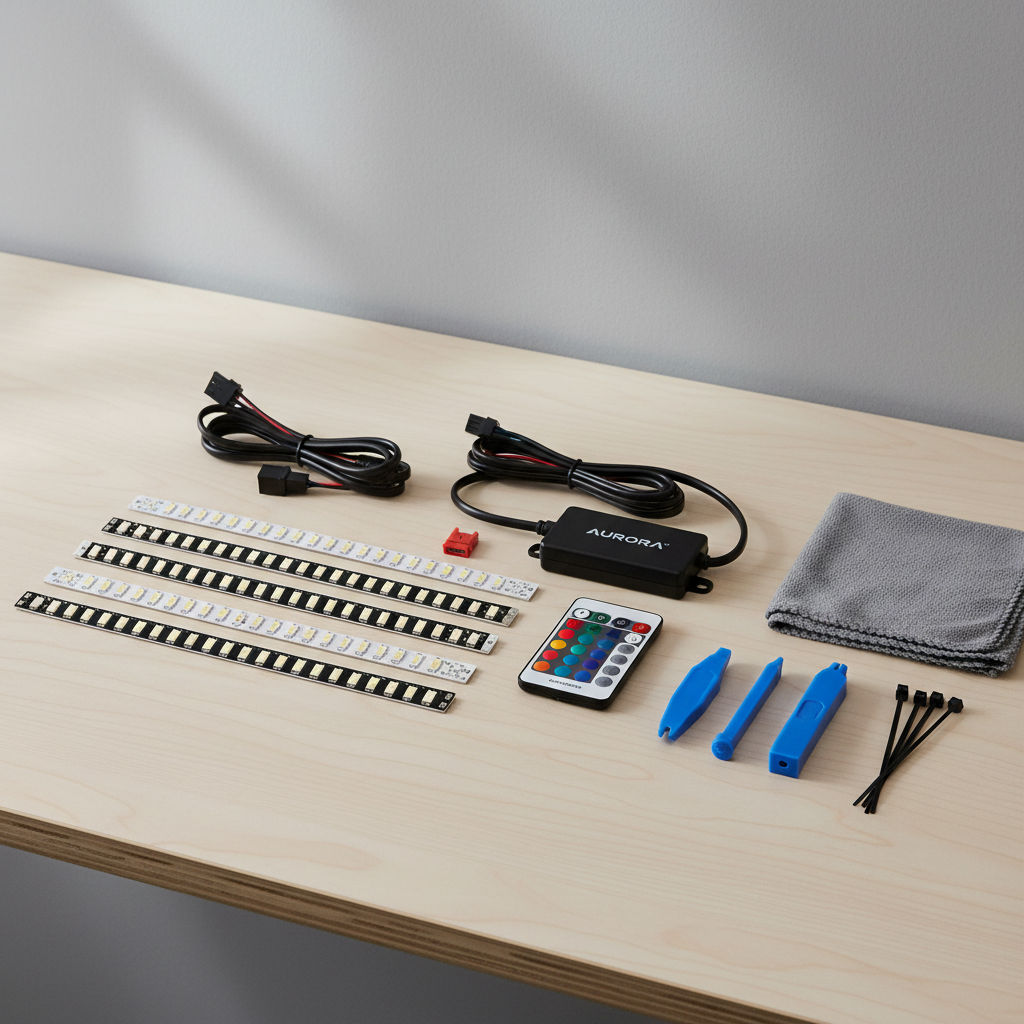
Tools and materials: what you actually need
You can install most kits with basic supplies. The trick is having the few items that prevent rework, especially in hot climates where adhesives fail.
- Trim removal tools (plastic pry tools) to tuck wires without scuffing panels
- Isopropyl alcohol (70%+), microfiber cloth for surface prep
- Zip ties and adhesive cable clips for strain relief
- Electrical tape or cloth automotive tape for clean bundling
- Fuse tap (add-a-fuse) and correct fuses if hardwiring
- Multimeter or test light to confirm switched vs constant power
- Heat gun (optional) for improving adhesion in colder weather
According to NHTSA, airbags and their components should not be modified or obstructed. In practice, that means keep wiring away from A-pillars, steering column areas, and side curtain airbag paths unless you are certain of safe routing.
Quick self-check: which power option should you use?
This is where most installs get decided. If you choose the wrong power source, you will either hate the look (cable clutter) or create annoying electrical behavior (flicker, lights staying on).
| Power method | Best for | Pros | Watch-outs |
|---|---|---|---|
| USB | Quick accent lighting | No fuse work, easy removal | May dim with low USB output, visible cable runs |
| 12V socket | Temporary installs, rentals | Fast install, usually stable power | Occupies socket, some sockets stay live when car is off |
| Hardwire to fuse box | Clean, long-term setup | Hidden wiring, can match ignition behavior | Wrong fuse choice can cause battery drain or nuisance issues |
| Dome light circuit | “Turns on with doors” effect | Nice OEM-like behavior | Can be finicky on modern cars, needs careful tapping |
Key takeaway: if you want the lights to turn off automatically with the car, aim for a switched 12V source. If you want “welcome lighting” when you unlock or open doors, you may prefer a circuit tied to interior lighting, but results vary by vehicle.
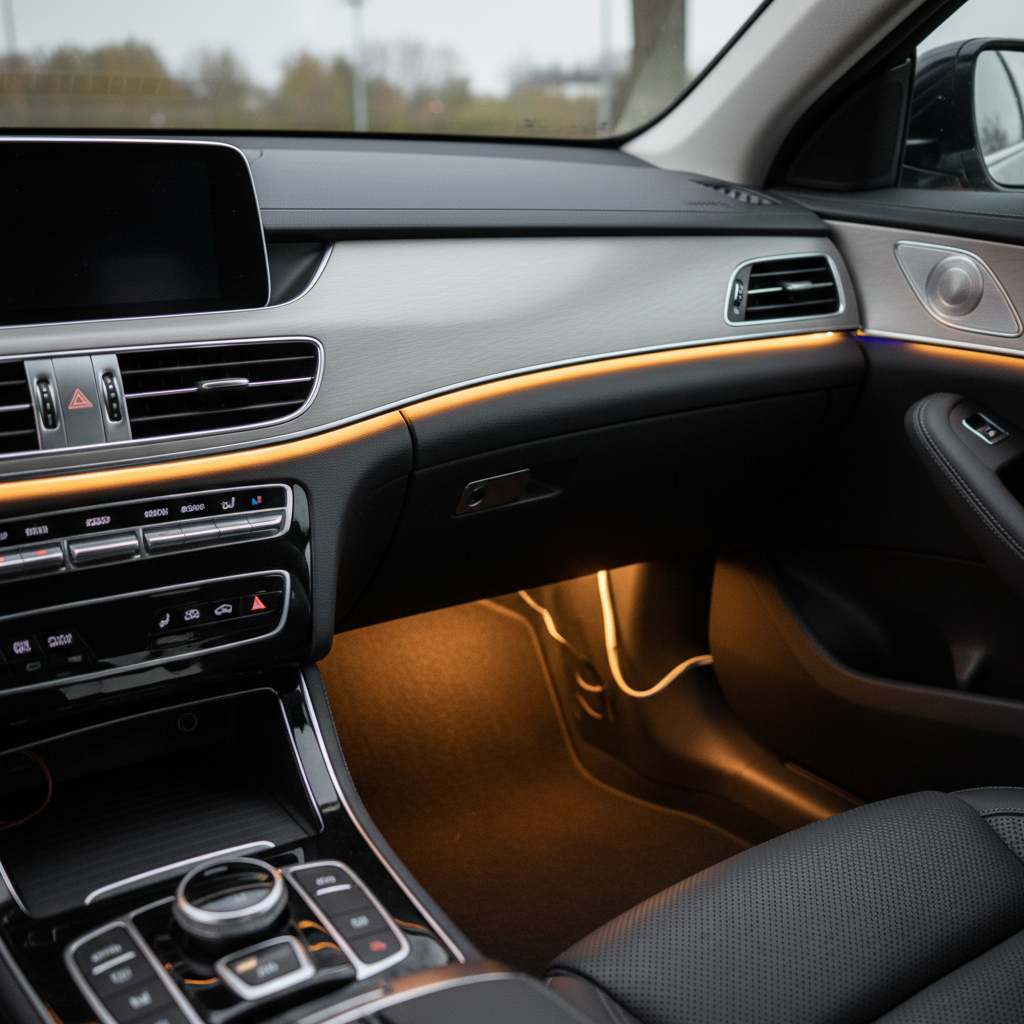
Plan placement and routing before you stick anything down
Even when people know how to install interior led lights in car, the layout step gets rushed, and that is when you end up with bright hotspots, dangling wires, or strips that peel off.
Good placement zones (most cars)
- Under dash / footwells: front driver and passenger areas, angled down so you do not see the LED points directly
- Under front seats: for rear footwell glow, keep away from seat tracks
- Door pocket / door trim: only if you can route wire without crossing airbag zones
- Center console edges: easy hiding spots for controller and cable runs
Routing rules that save headaches
- Follow existing harness paths when possible, it looks cleaner and is usually safer.
- Avoid moving parts: seat rails, pedals, steering linkage, glove box hinges.
- Do not route wiring over or through airbag covers or airbag deployment paths.
- Leave slack for seat movement, then secure the slack so it does not snag.
Step-by-step installation (clean install without drama)
Below is a practical workflow that fits most LED strip kits, whether you power by USB, 12V socket, or hardwire. The mounting and routing steps stay almost the same.
1) Dry fit everything
- Hold strips in place with painter’s tape.
- Confirm wire lengths reach the controller and power source without tension.
- Check at night or in a dark garage if possible, brightness looks different than daytime.
2) Prep surfaces the “boring” way
- Clean mounting areas with isopropyl alcohol, let it fully dry.
- Avoid sticking to textured fabric, dusty plastics, or rubberized coatings when you can.
- If it is cold, gently warm the area and the adhesive backing, don’t melt anything.
3) Mount strips and add strain relief
- Press firmly for 20–30 seconds per section.
- Add a zip tie or cable clip near each strip end so wire tugging does not peel the strip.
- If your kit includes screws or brackets, use them where heat tends to loosen tape.
4) Route and secure wiring
- Tuck wires behind trim with a plastic pry tool, do not force it.
- Bundle extra wire and secure it, avoid leaving loops that can drop near pedals.
- Keep controller accessible enough to reach pairing/reset buttons if your kit has them.
5) Connect power (choose your scenario)
- USB: plug into a USB port, confirm the port turns off when the car shuts down if battery drain worries you.
- 12V socket: plug in and test ignition behavior, some vehicles keep sockets live.
- Fuse tap hardwire: use a multimeter to find a switched fuse slot, install the add-a-fuse with correct orientation, and use a solid ground point on bare metal.
If you are not comfortable identifying a switched circuit or grounding point, it is reasonable to ask a car audio shop. A short “power + ground” job is usually quick for them, and it reduces the chance of chasing gremlins later.
Testing, troubleshooting, and dialing in the look
Test in small steps. If something behaves oddly, it is easier to fix now than after you zip-tie everything tight.
- No power: check the inline switch, polarity (common on simple kits), and fuse if hardwired.
- Flicker: weak USB power, loose connector, or a cheap controller can cause it; try a different power source to isolate the problem.
- Lights stay on: you likely used constant power; move to a switched circuit if you want auto-off.
- Uneven glow: rotate strips so LEDs point at the floor or a surface that diffuses light, not straight into open space.
- Adhesive failing: re-clean, then use better automotive tape or mounting clips; heat and interior cleaners often weaken bargain adhesive.
Quick tip: set brightness lower than you think you need. In real driving, overly bright footwell lights can feel distracting, especially on dark roads.
Safety notes and common mistakes to avoid
Interior LEDs are low-voltage, but the install can still create safety issues if wires interfere with driving controls or airbags.
- Do not run wires near pedals, even “temporarily.” Foot snagging is a real risk.
- Avoid airbag zones: A-pillars, side curtain areas, steering column covers. According to NHTSA, interfering with airbag components can affect performance.
- Don’t stack fuses incorrectly: use the fuse tap as designed, and match fuse ratings to the circuit and the accessory.
- Skip “twist and tape” splices for permanent installs; vibration and heat loosen weak connections.
- Be careful with battery work: if you disconnect the battery, some cars need radio codes or reset procedures, check your owner’s manual.
Conclusion: a clean LED install is mostly planning
If you want a result that feels intentional, treat the job like a layout and wiring exercise, not a sticker project. Decide your power source early, mock up placement, clean surfaces properly, then secure wiring so nothing moves or rubs.
Your next action can be simple: pick one zone (front footwells), install it neatly, live with it for a few nights, then expand. That approach keeps you from redoing the whole car when you realize you prefer a softer color or a different on/off behavior.
If you get stuck on fuse selection, grounding, or airbag-adjacent routing, a reputable car audio installer can usually finish the “hard” part quickly, while you still handle placement and styling.