
how to fix small exhaust leak usually comes down to two things: finding exactly where the leak starts, then choosing a repair that matches the location and heat level so it actually holds.
If you ignore a small leak, it often gets louder, can trip an emissions-related code, and may let exhaust smell sneak into the cabin, which is the part that deserves real respect.
The good news is many “small” leaks are at joints, clamps, or a tired gasket, and those can be handled in a driveway with basic tools, as long as you’re honest about what you’re seeing.

What a “small exhaust leak” usually looks and sounds like
Small leaks tend to show up as a light ticking on cold start, a faint hiss under throttle, or a sooty trail around a joint, flange, or weld. The sound often changes as metal warms up and expands, which tricks people into thinking the issue “went away.”
Location matters more than volume. A pinhole after the catalytic converter is annoying, but a leak near the exhaust manifold or before the cat can be more serious because hot gases and noise sit closer to the cabin and critical parts.
- Ticking that speeds up with RPM: often manifold, manifold gasket, or a cracked flex section up front.
- Hiss or “puff-puff” near the middle: common at slip joints, clamps, and flanges.
- Visible black soot: strong clue you found the leak path.
Safety first: fumes, heat, and getting under the car
Exhaust work looks simple until it isn’t, mainly because you’re dealing with heat, rust, and carbon monoxide risk. According to CDC, carbon monoxide is an odorless gas that can cause serious harm, so if you ever smell exhaust inside the car, treat it as urgent and avoid long drives until the source is addressed.
Let the exhaust cool fully, work on a flat surface, and use jack stands, not just a jack. If you’re unsure about safe lifting points for your vehicle, check the owner’s manual, that detail saves a lot of grief.
- Wear eye protection, rust flakes fall straight down.
- Keep a spray bottle of soapy water away from hot pipes, use it only when cool or just warm.
- If you feel dizzy or get a headache while diagnosing, stop and get fresh air.
Quick diagnosis: confirm the leak before you “fix” anything
Before you buy paste, tape, or parts, confirm the leak location. This is where most DIY repairs go sideways: people treat the symptom (noise) and miss the real opening.
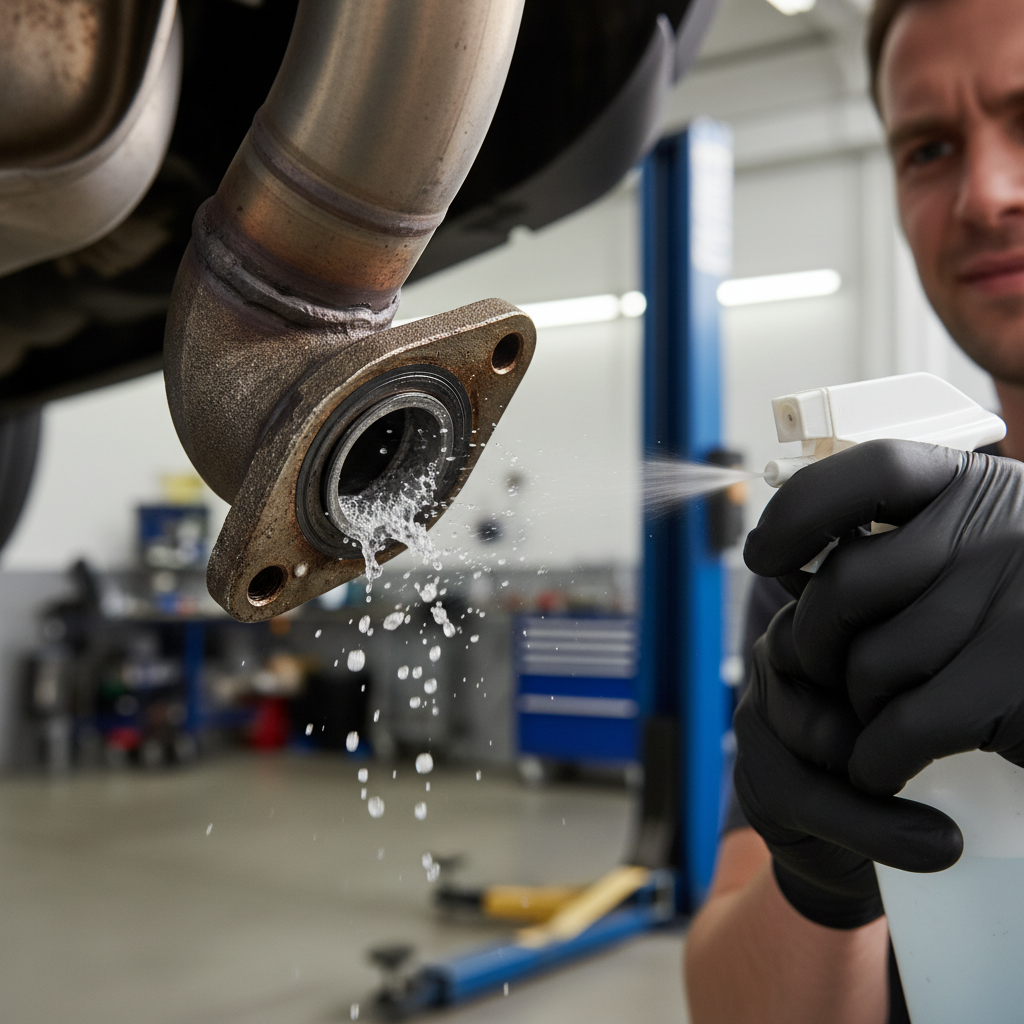
DIY leak-finding methods that usually work
- Visual check: look for soot, fresh rust trails, or a wet-looking streak at a joint.
- Hand “feel” (carefully): with the engine running and exhaust still cold, hover your hand near suspected areas to feel puffs. Don’t touch the pipe.
- Soapy water: spray on a cold joint, then start the engine briefly. Bubbles can reveal the exact seam.
- Paper strip test: hold a thin strip of paper near a suspected leak to see it flutter.
Key point: if the leak is at the manifold, near an O2 sensor bung, or you can’t access the area without removing shields, that’s often the moment to slow down and consider a shop.
Choose the right fix: clamp, gasket, patch, or replacement
Not every “sealant” belongs on an exhaust. High heat and vibration punish shortcuts, so match the repair to the failure.
| Leak location | Common cause | Repair that tends to last | DIY difficulty |
|---|---|---|---|
| Slip joint / clamp area | Loose clamp, corrosion at overlap | Re-seat joint + new clamp (band clamp often seals better) | Easy |
| Flange connection | Crushed gasket, warped flange, snapped bolt | Replace gasket + hardware, check flange flatness | Medium |
| Flex pipe | Cracked braid or inner liner | Replace flex section (often weld-in), sometimes bolt-in assembly | Medium to Hard |
| Small hole in pipe/muffler (rear section) | Rust pinhole | Replace section, or temporary patch with exhaust repair wrap | Medium |
| Manifold / near catalytic converter | Gasket leak, crack, failed studs | Gasket/stud repair, sometimes manifold replacement | Hard |
Step-by-step: three common DIY repairs for a small leak
These are the driveway-friendly approaches that fit most “small leak” situations. If you’re aiming for a quiet, durable result, prioritize mechanical sealing (gaskets, clamps) over goop.
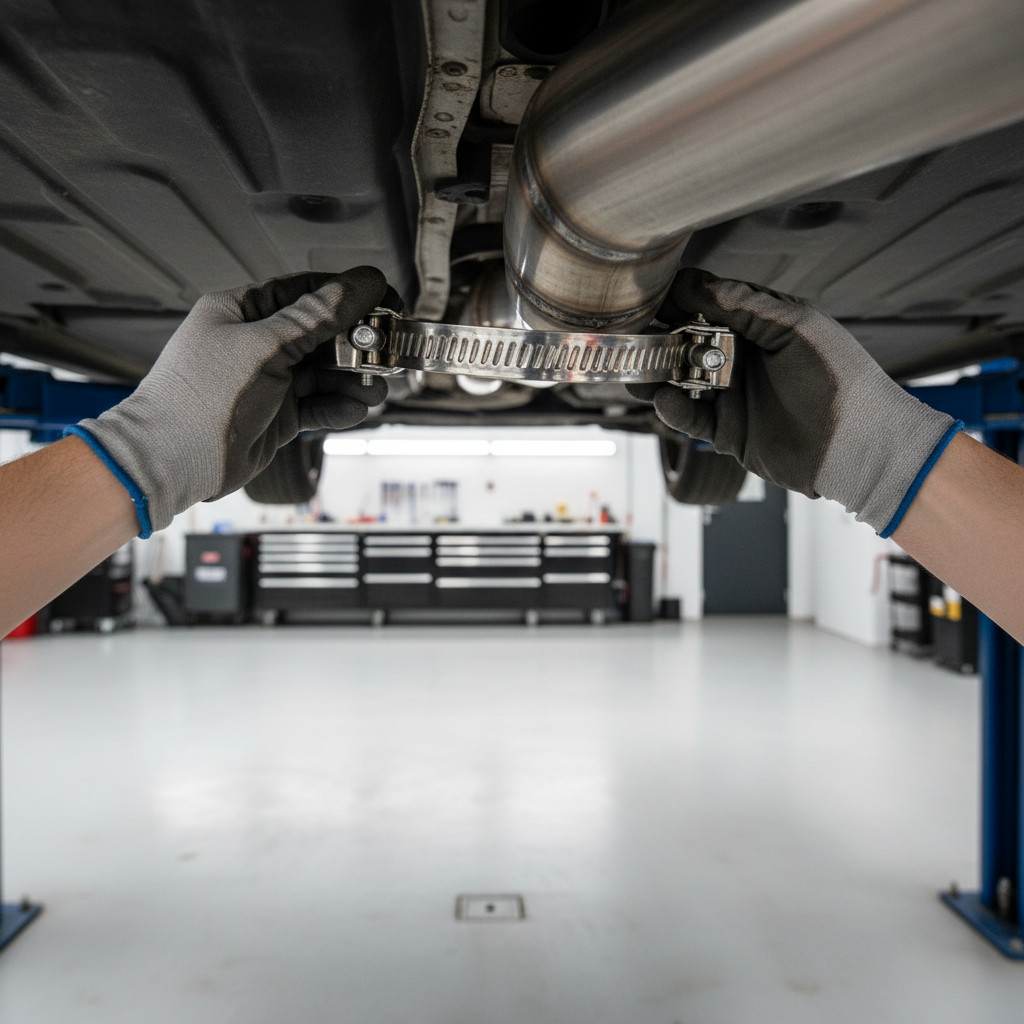
1) Tighten or replace an exhaust clamp at a slip joint
This is the cleanest win when you’re dealing with a seam leak.
- Support the pipe so the joint sits naturally, not under tension.
- Loosen the old clamp, twist and re-seat the overlap so it bottoms evenly.
- Install a new clamp. Band clamps often seal better than U-bolts and deform the pipe less.
- Tighten gradually and evenly, then recheck after a short heat cycle.
2) Replace a flange gasket (and don’t ignore hardware)
If bubbles or soot appear at a two-bolt or three-bolt flange, the gasket or the flange face is usually the story.
- Soak bolts with penetrating oil, give it time, rushing snaps studs.
- Remove bolts, separate flange, scrape old gasket material carefully.
- Inspect flange faces for pitting or warping. Minor pitting might still seal, severe warping usually won’t.
- Install a new gasket and new bolts/nuts when possible, then tighten evenly.
If bolts shear, that moves from “simple gasket job” to drilling/extraction, which many people prefer to hand off to a muffler shop.
3) Patch a small hole (best as a temporary repair)
For a pinhole in the rear pipe or muffler, patch products can buy time, but they’re rarely a forever fix in salty climates.
- Wire-brush the area to bare metal around the hole, at least 1–2 inches of clean surface.
- Use an exhaust-specific repair wrap or patch kit rated for high temperature, follow cure instructions exactly.
- Expect to replace the section later if rust has thinned surrounding metal.
Self-check: are you fixing the right thing?
This quick checklist helps you decide whether your plan matches the leak, and whether it’s still “small” in any meaningful way.
- Noise level: still fairly quiet, no roaring under load.
- Leak location: not at the manifold, not right by the catalytic converter inlet, not near fuel/brake lines.
- Hardware condition: bolts look removable, not fused into a single rust sculpture.
- Pipe condition: metal around the leak feels solid, not paper-thin.
- Cabin smell: no exhaust odor inside the car. If there is, pause and reassess.
Key takeaway: if rust has spread beyond one spot, “patching the hole” can turn into a repeating weekend project.
Common mistakes that make small leaks come back
A lot of people can technically stop the hiss, then it returns a week later because the underlying fitment never got corrected.
- Using the wrong sealant: regular RTV isn’t designed for direct exhaust stream heat and pressure.
- Clamping over misalignment: if the pipe is hanging at an angle, the clamp can’t seal evenly.
- Over-tightening U-bolts: it can crush the pipe, creating new leaks at the edges.
- Ignoring flange flatness: a new gasket can’t compensate for a badly warped flange.
- Skipping a re-torque: after a heat cycle, clamps and bolts often need a check.
When it’s smarter to get professional help
There’s no shame in outsourcing the hard versions of this job, muffler shops do them all day and usually have the cutting and welding tools ready.
- Leak sits at the exhaust manifold, turbo, or catalytic converter connections.
- You have a check engine light tied to O2 sensor readings, or you suspect an upstream leak.
- Bolts are seized, rounded, or likely to snap, and you rely on the car daily.
- The flex pipe is failing. Many repairs require welding or replacing a larger assembly.
- You smell exhaust in the cabin, especially at idle with windows up.
If you’re in a state with emissions testing, a shop can also help confirm whether a repair will pass inspection, since rules vary by location and vehicle.
Conclusion: a small leak is fixable, if you match the fix to the spot
Most people who successfully learn how to fix small exhaust leak do two things right: they verify the exact leak point before buying parts, and they choose a repair that’s mechanical first, sealant second. Start with joints and clamps, move to gaskets if the leak sits at a flange, and treat patches as a stopgap when rust already has momentum.
If you want a simple next step, grab a good light, do a quick soot and soapy-water check on a cold system, then decide whether you’re dealing with a clamp job, a gasket job, or a section that really needs replacement.